How to Boil Corn on the Cob
Boiled Corn on the Cob
Follow my easy steps to making corn on the cob a great side dish for any meal! *Perfect for corn lovers!*
Corn can be prepared in a variety of ways and all are super delicious! The easiest way to make corn on the cob in my opinion is to boil it and serve just the way it is with butter, salt, and pepper. When you boil the corn it comes out nice and juicy with the perfect amount of crisp to each bite. Corn is an awesome dish that goes with almost any meal and everyone always loves it, especially at BBQ’s!
Here are some recipes to pair your boiled corn on the cob with:

Tricks to the Perfect Corn on the Cob
How to Boil Corn on the Cob
No Ratings
Follow my easy steps to making corn on the cob the perfect side dish for any meal!
Prep Time
10 minutes
Cook Time
35 minutes
Total Time
45 minutes
Ingredients
- Corn husks
Instructions
- Find the largest pot you have and add 1 quart of water per ear of corn.
- Bring it to a boil and add some salt. Once the water starts to boil add the corn and watch it carefully for about 4-5 minutes.
- When the water begins to boil again take the pot off of the heat and put a cover over it.
- Let the corn sit in the water for about 30 minutes and then remove from the pot.
- Serve and enjoy with butter, salt, and pepper!
-
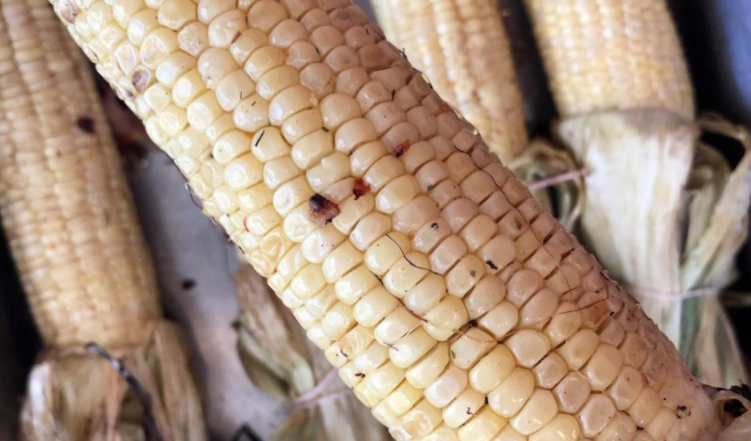
Step 1: Picking the best corn
- Choosing which corn to buy is very important and often times people don’t even realize if they are buying a good bunch. You want the husk to be wrapped tightly around the corn and a nice bright green color. If it is a little bit damp on the outside this is also a good sign of a perfect corn. The husk shouldn’t have any holes in it or look yellow in color.
-
Step 2: How to properly shuck your corn
- To make this process a lot easier you want to make sure that the silky tassel is still attached because this is what you will hold when shucking. Start by placing the corn in the microwave for about 3-5 minutes to loosen the silk. Cut the end off and then hold the tassel in one hand and slowly peel the rest of the leaves and silk with the opposite hand in one motion. This method should take most of the silk off with it but make sure to clean it up afterwards also. There may be a small amount of silk remaining still but that is part of making corn on the cob!
-
Step 3: Boiling the corn
- Find the largest pot you have and add 1 quart of water per ear of corn. Bring it to a boil and add some salt. Once the water starts to boil add the corn and watch it carefully for about 4-5 minutes. When the water begins to boil again take the pot off of the heat and put a cover over it. Let the corn sit in the water for about 30 minutes and then remove from the pot.
-
Step 4: Serve and enjoy!
- Pat your corn dry from the water and cover them with butter. I like adding salt and pepper to mine and corn holders are a great item to have in your kitchen! Poke them on both sides and make it easier to enjoy and eat.
-
Step 5: Storing corn
- Summer is the best time of the year for corn and this is when you should buy the corn husks to store! Corn with the husk still on can only last in the fridge for a few days but once you cook it they will last much longer. Cut the kernels off after cooking and place them in an airtight container to put in the freezer. These can last up to 6 months so you can enjoy yummy corn as all times of the year and not just summer time!
Other Corn Recipes
If corn on the cob isn’t for you then cut the kernels off and use them for some delicious recipes. I have tons on my website and also in my cookbook that is available for purchase here. Try out some of these: