Eyeball Red Velvet Cake Balls
Eyeball Red Velvet Cake Balls
Are you hosting this year’s Halloween party or are you needing to bring a dish to a party and you want to make an impression? These red velvet cake balls will stop everyone in their tracks.
Looking for some other Halloween favorites? Check out these!
- Halloween Bats
- Ooey Gooey Candy Corn Chex Mix
- White Chocolate Halloween Popcorn
- Halloween Food Ideas
- Ham and Cheese Mummy
- White Chocolate Strawberry Ghosts
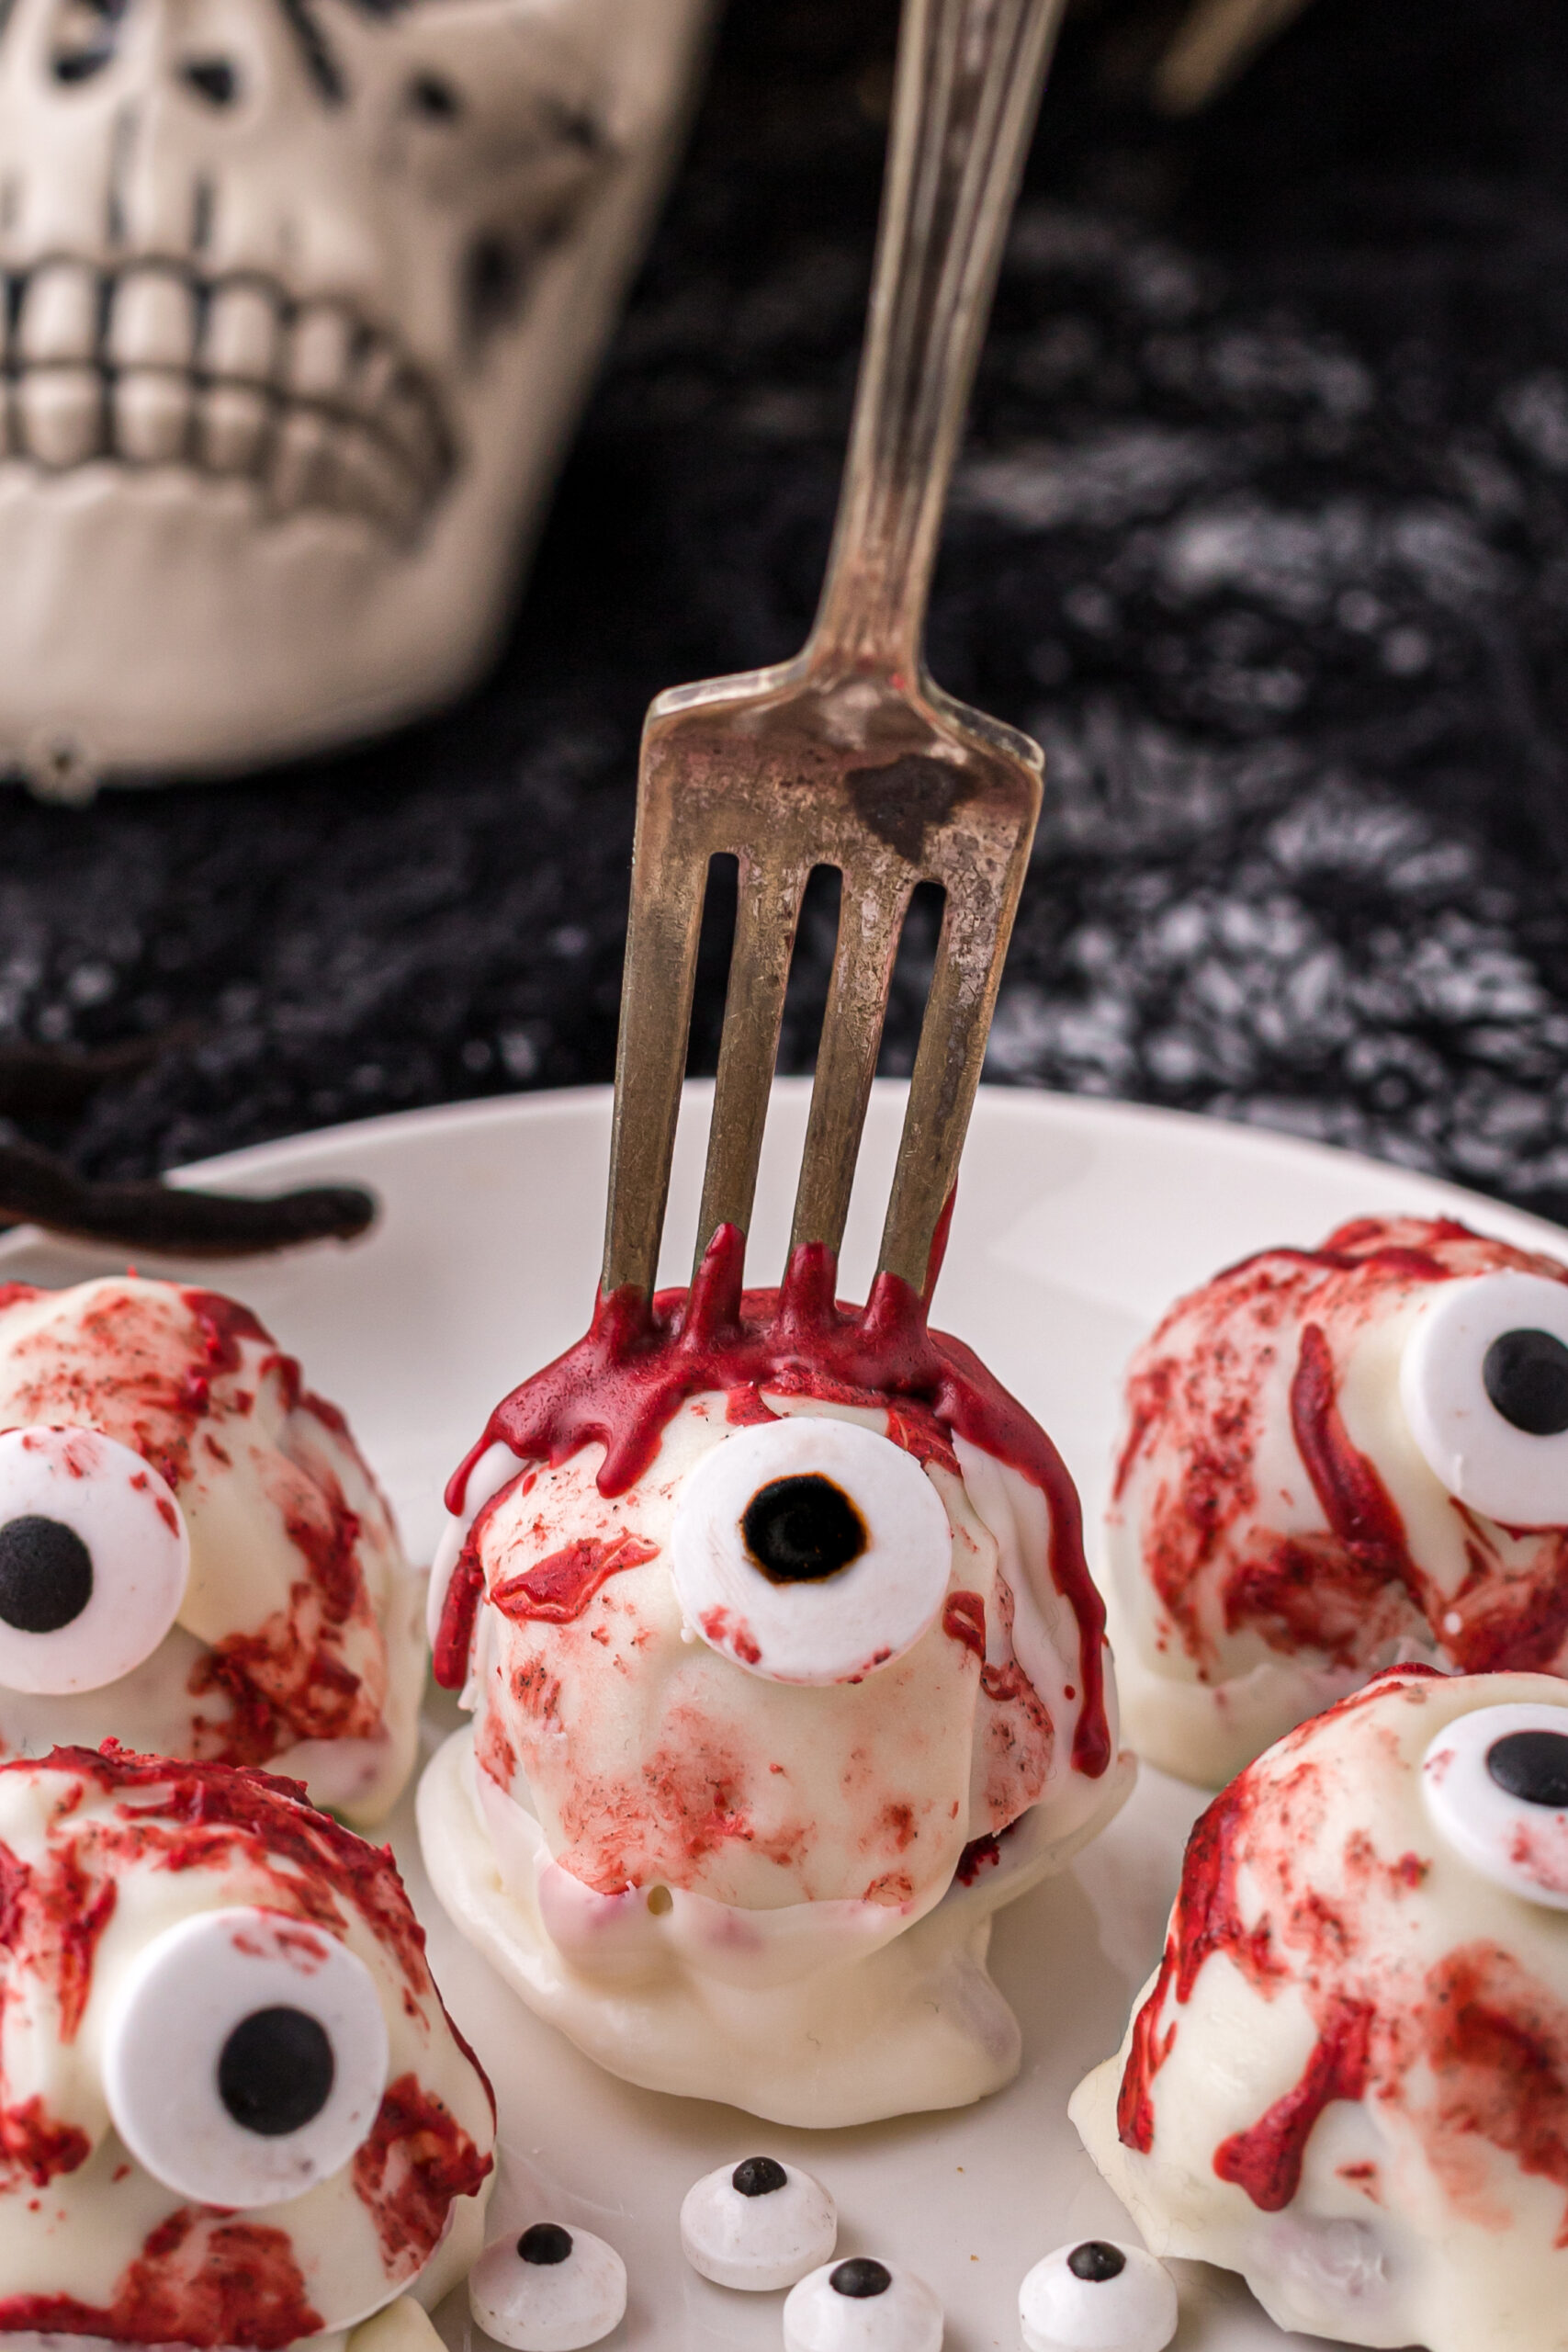
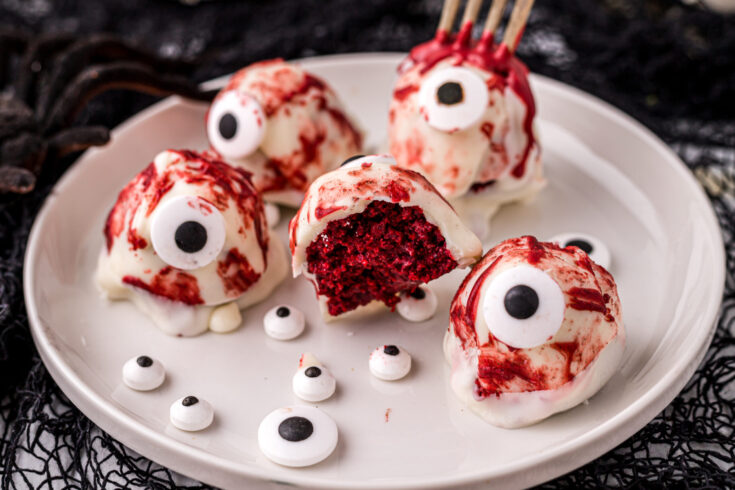
Impress your guest with this extreme dessert that will only take you 90 minutes to put together. Talk about a statement piece, with a realistic eyeball that is actually red velvet cake dipped in white chocolate, everyone will be questioning whether or not these eyeballs are real. Eyeballs will be the perfect party favor for all your guests.
Eyeball Red Velvet Cake Balls
Ingredients
Instructions
Red velvet cake, cream cheese frosting, red melting chocolate, white melting chocolate, coconut oil, candy eyes, tooth pick, paint brush, baking sheet, parchment paper, and 1 inch ice cream scooper.
Serving Size: 1
Yields: 25
Total Time: 90 minutes
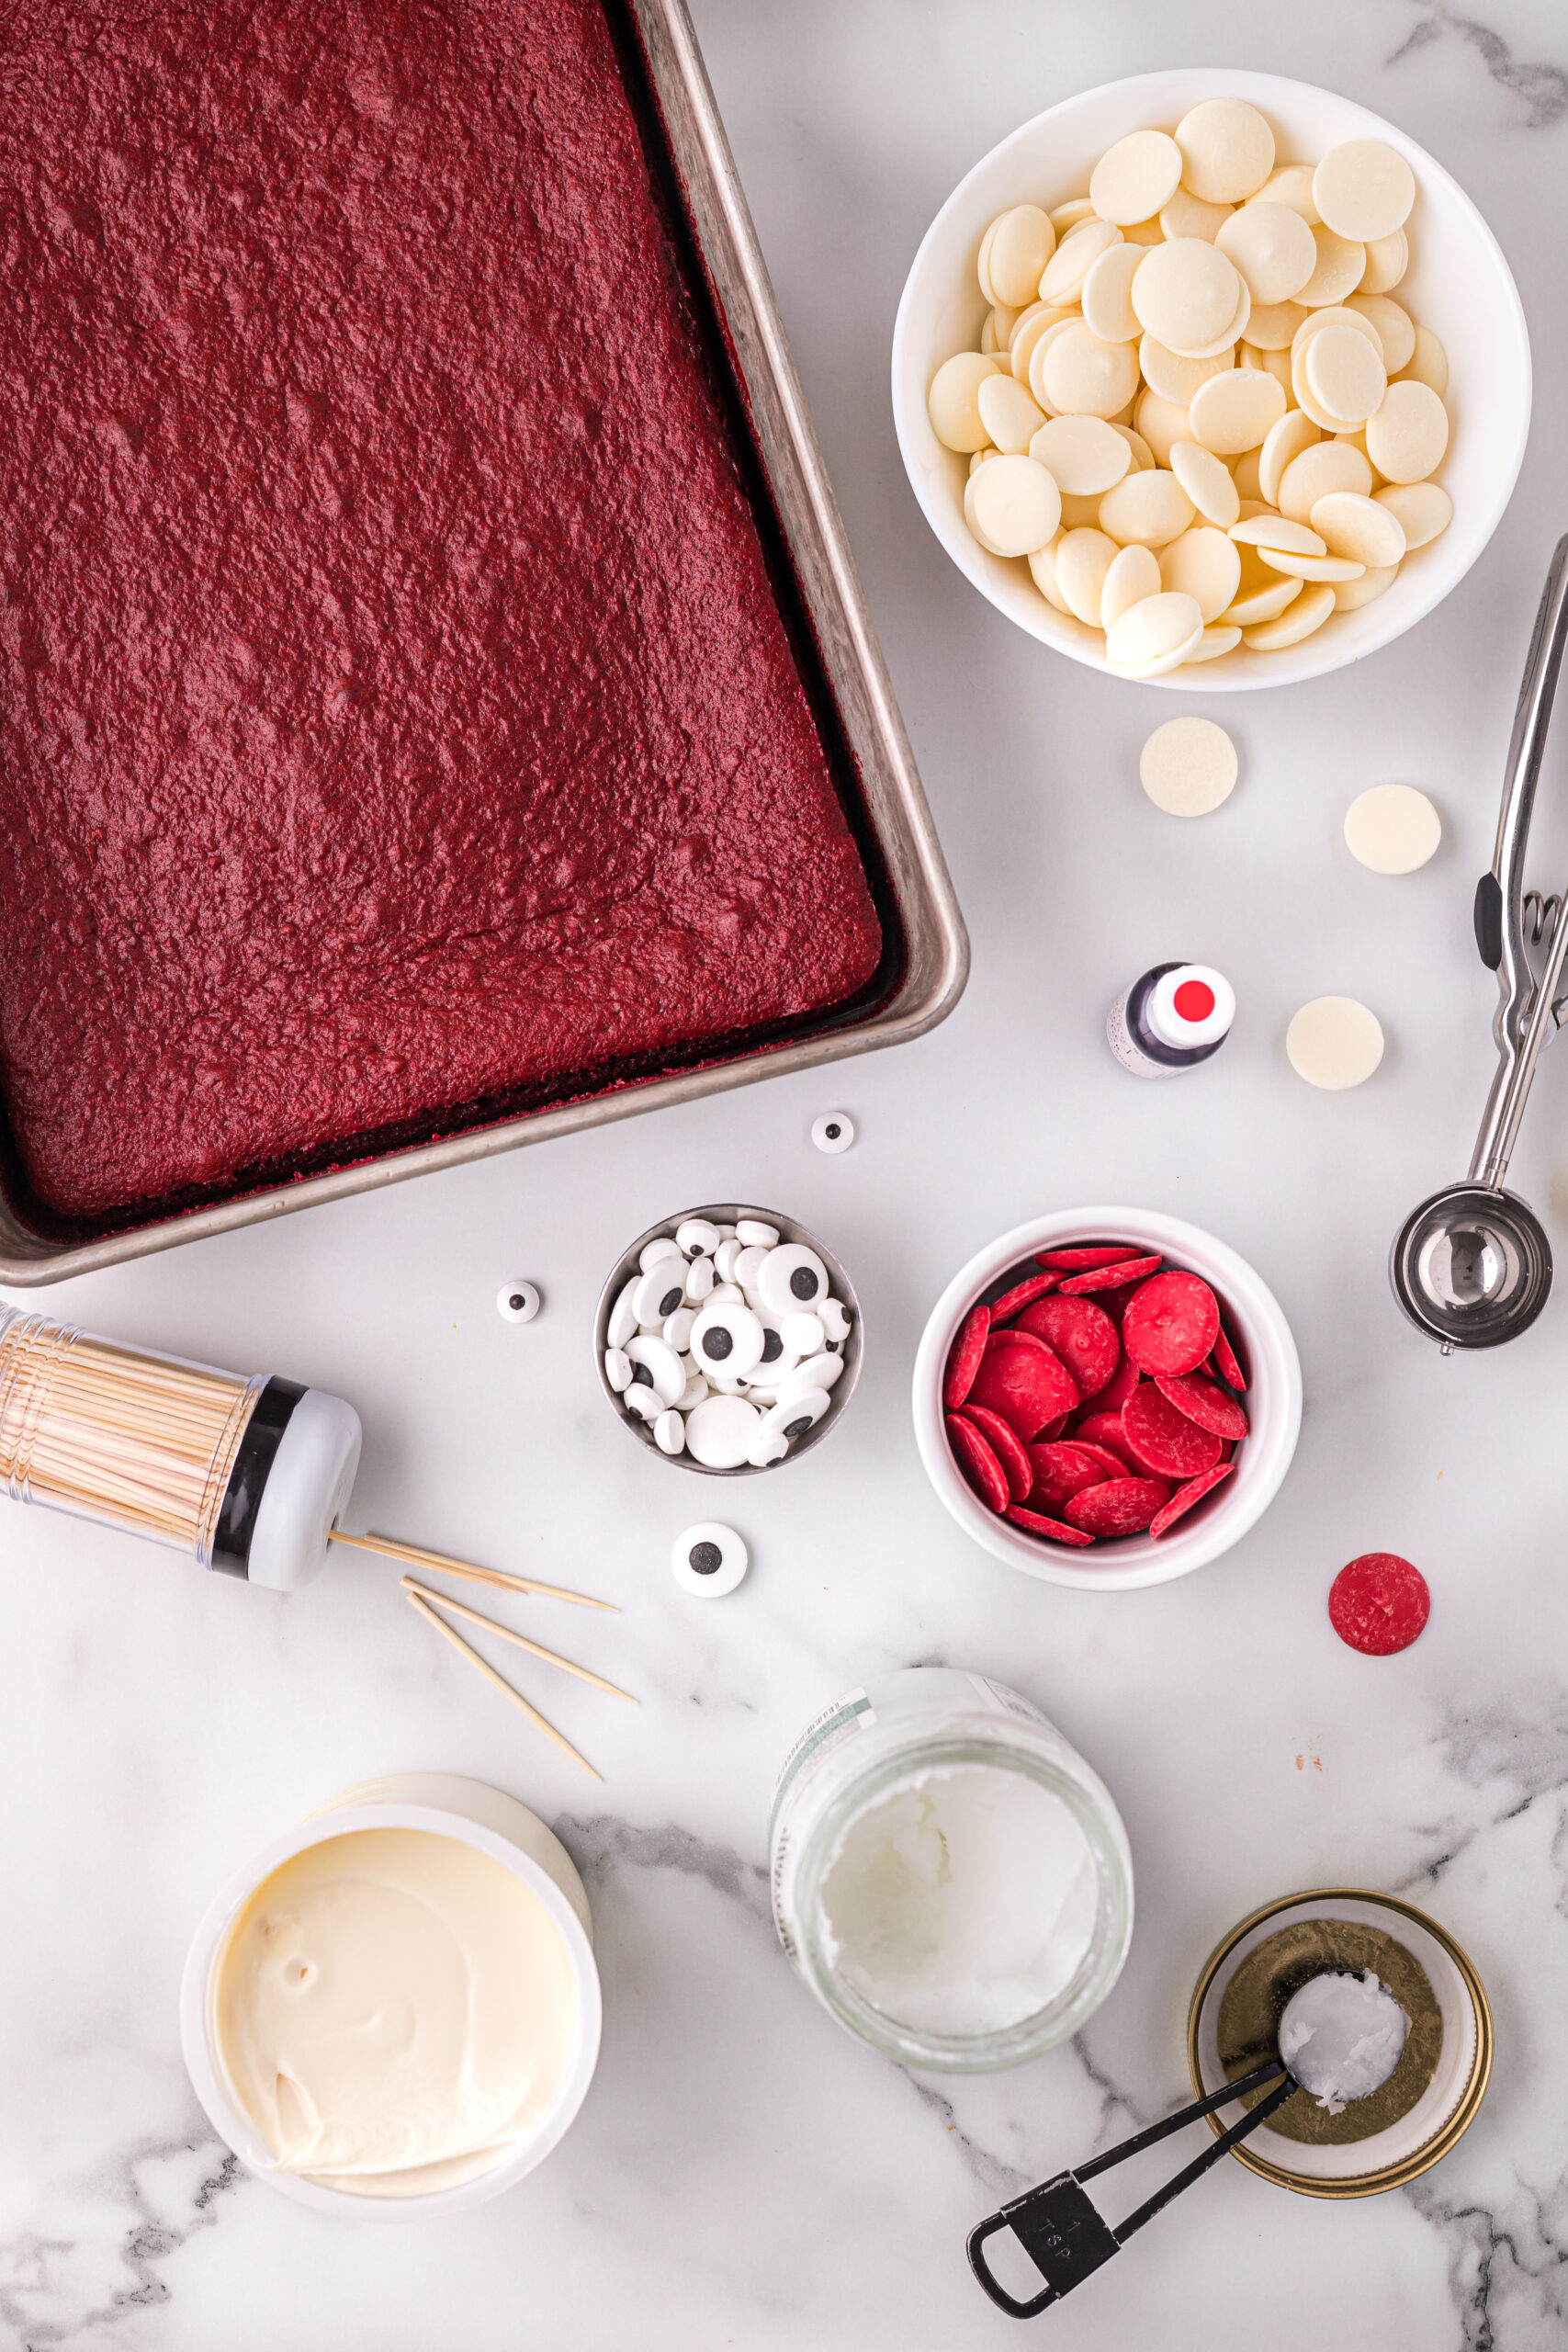

Ingredients
- 1 Red velvet cake, baked and cooled (I used Duncan Hines)
- 1 cup cream cheese frosting, (such as Duncan Hines cream cheese whipped frosting 14 oz.) 2 cups White candy melts (Wiltons 12oz. bag)
- ½ cup red candy melts (Wiltons 12oz bag)
- 2 teaspoons coconut oil
- Candy eyes
Supplies you will need: baking sheet, parchment paper, 1” ice cream scooper, tooth pick, and paint brush
Instructions
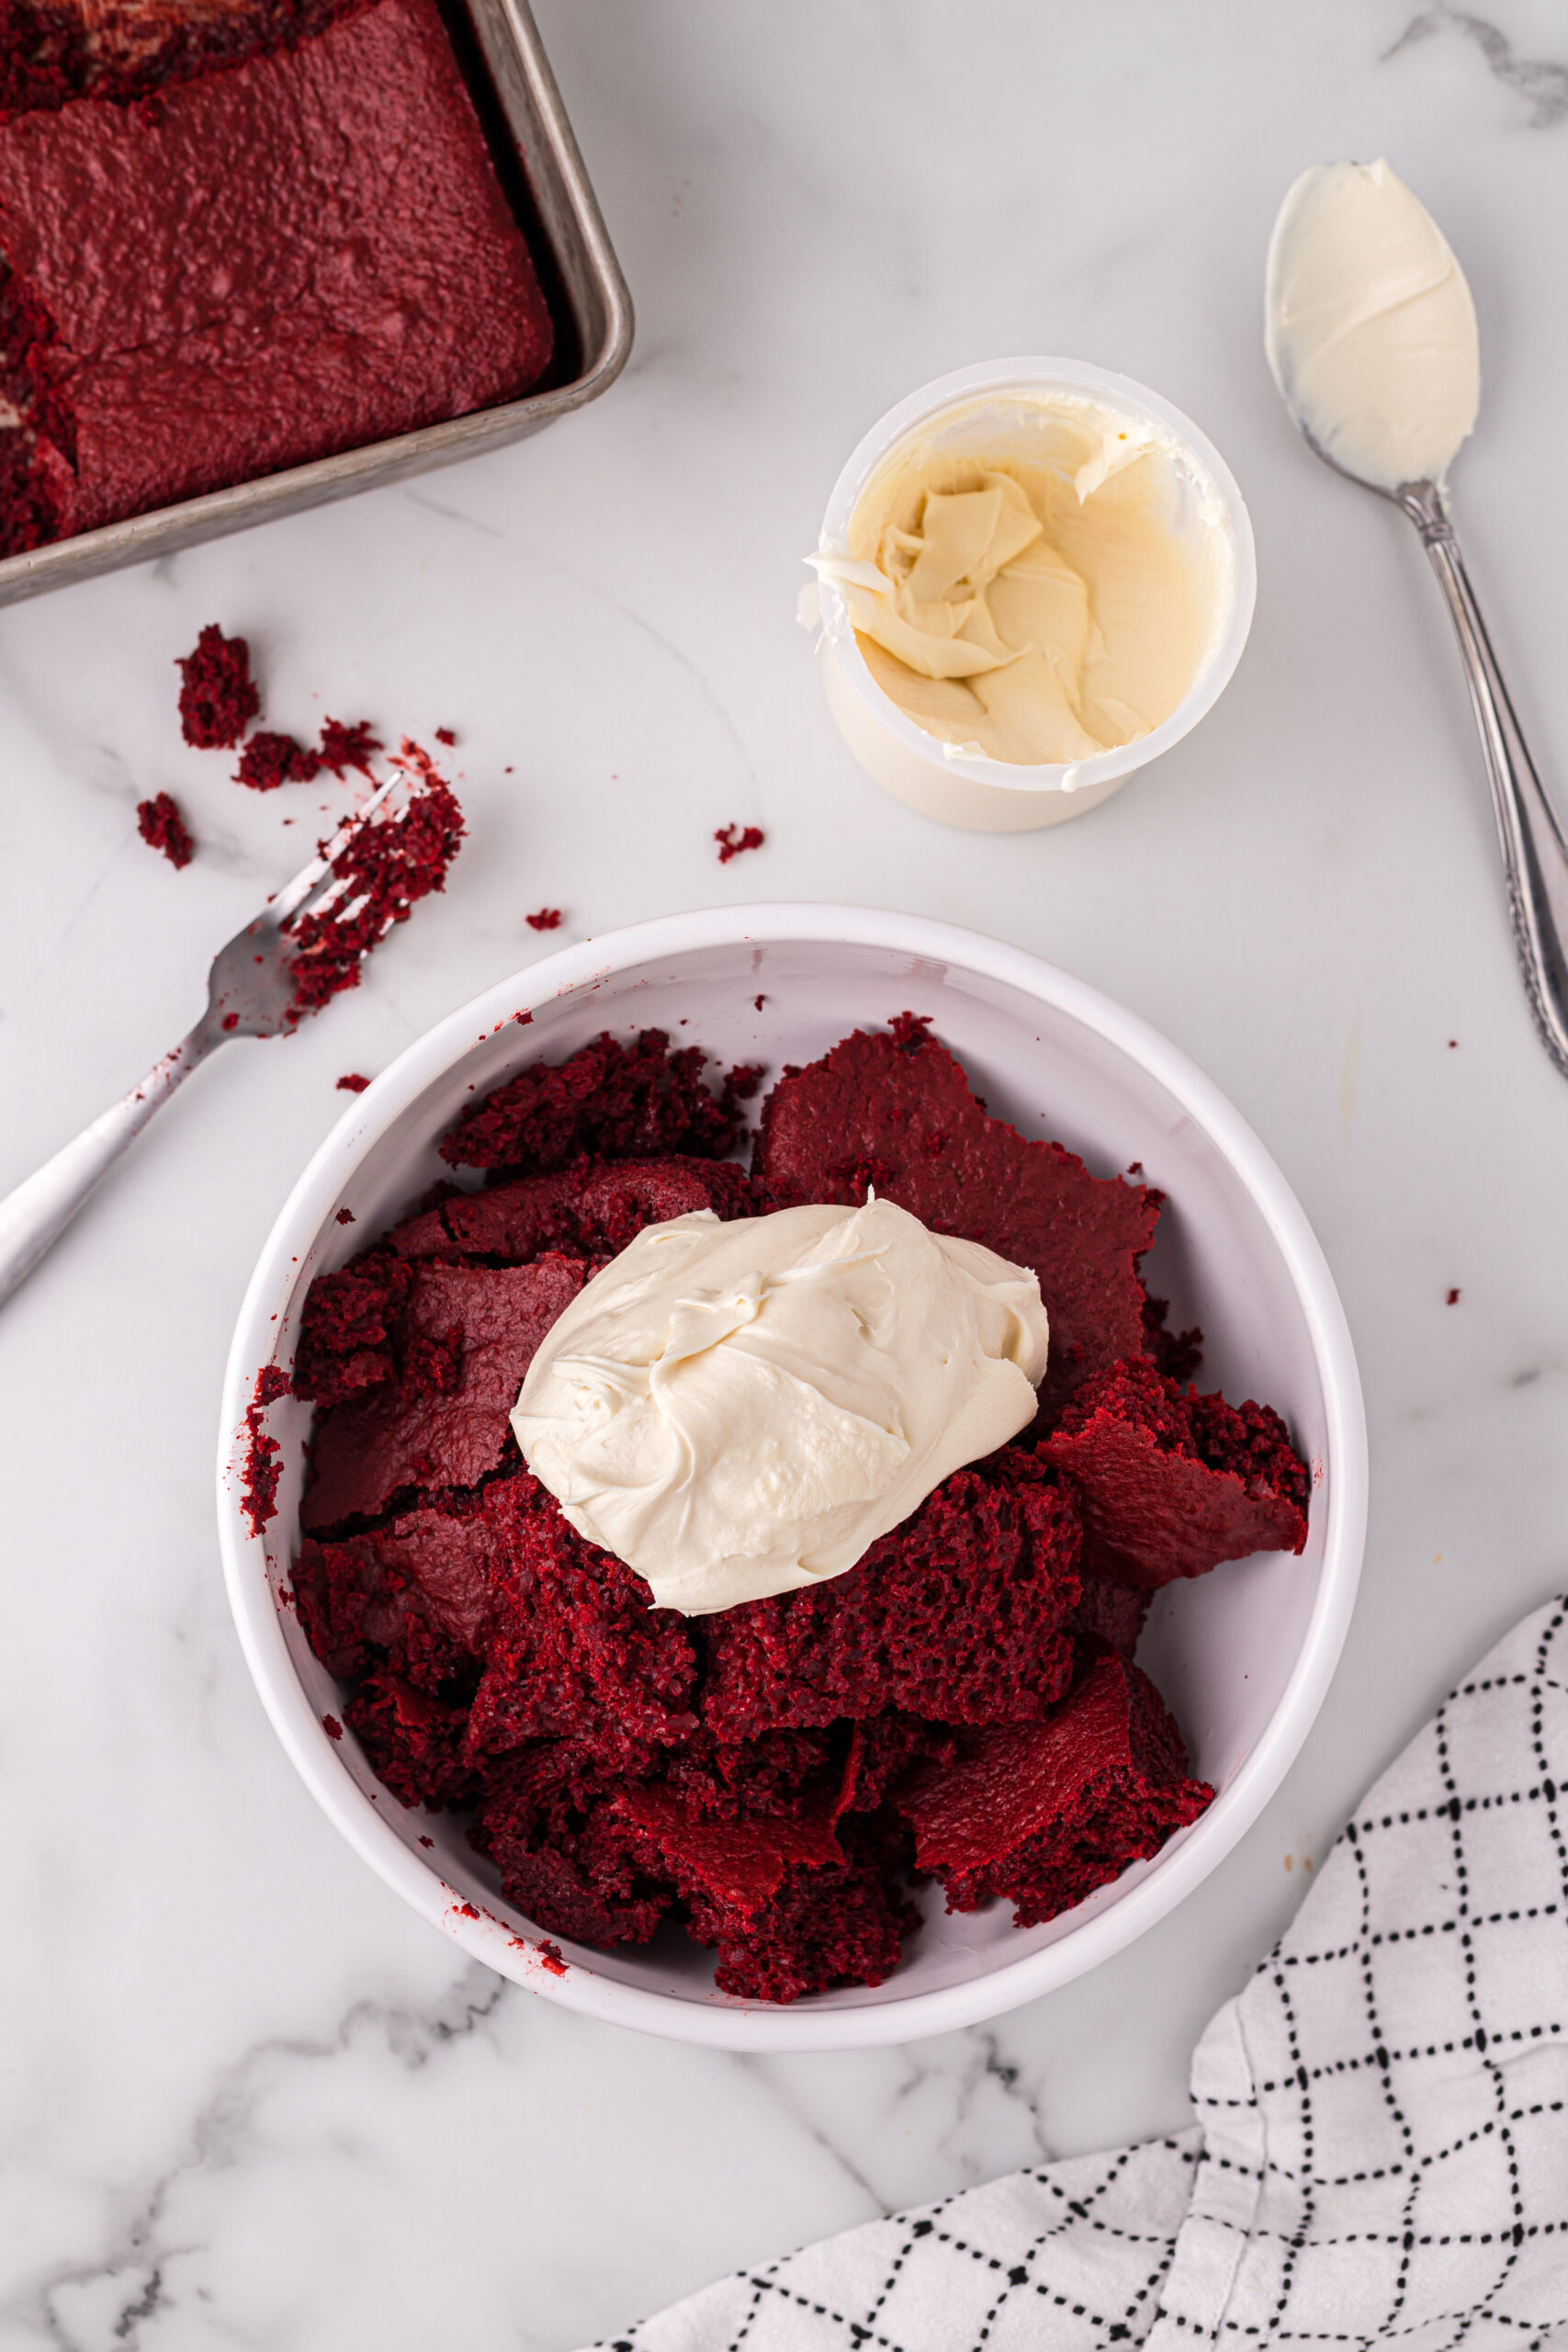
- In a large bowl crumble cooled red velvet cake.
- Add in cream cheese icing to crumbled cake and mix until combined completely, and set cake mix aside.
- Add parchment paper to baking sheet.
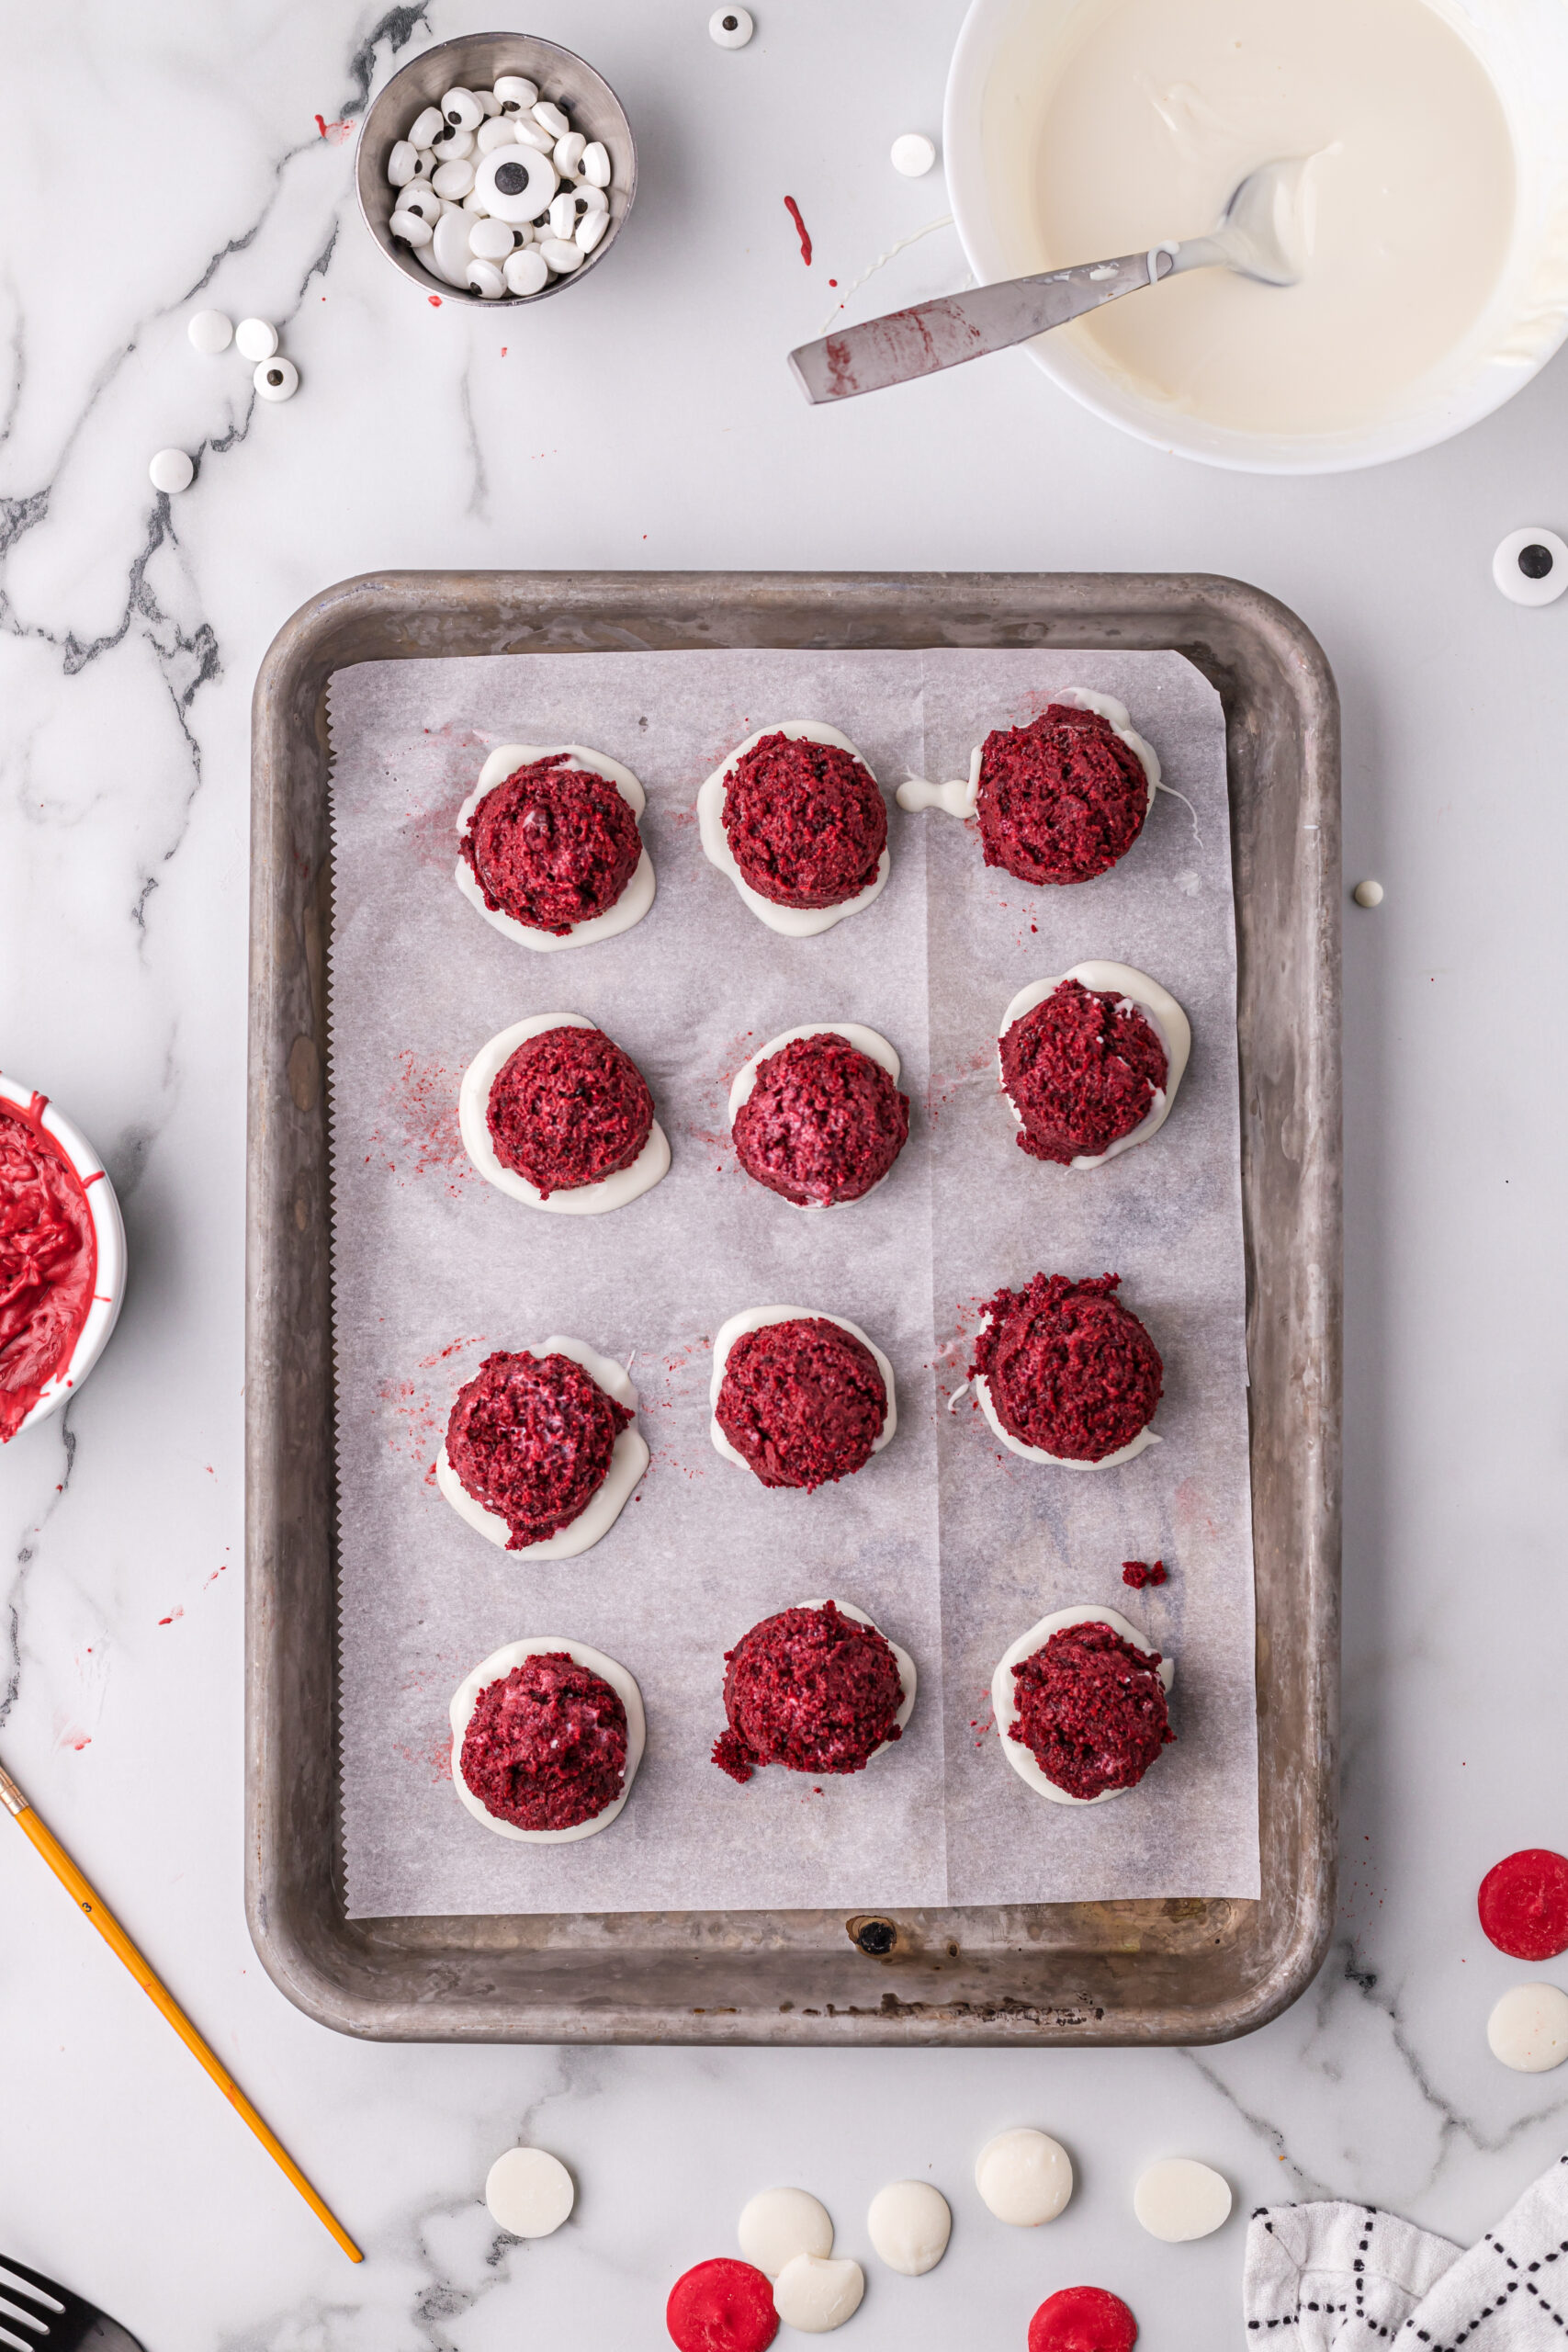
- Scoop cake mix with 1” scooper and place each cake ball on the baking sheet. Place in freezer for 30 minutes.
- In a microwavable bowl add white candy melt and 1 teaspoon of coconut oil. Microwave candy melts in 30 second intervals, stir between intervals until completely melted. Repeat with red candy melts.
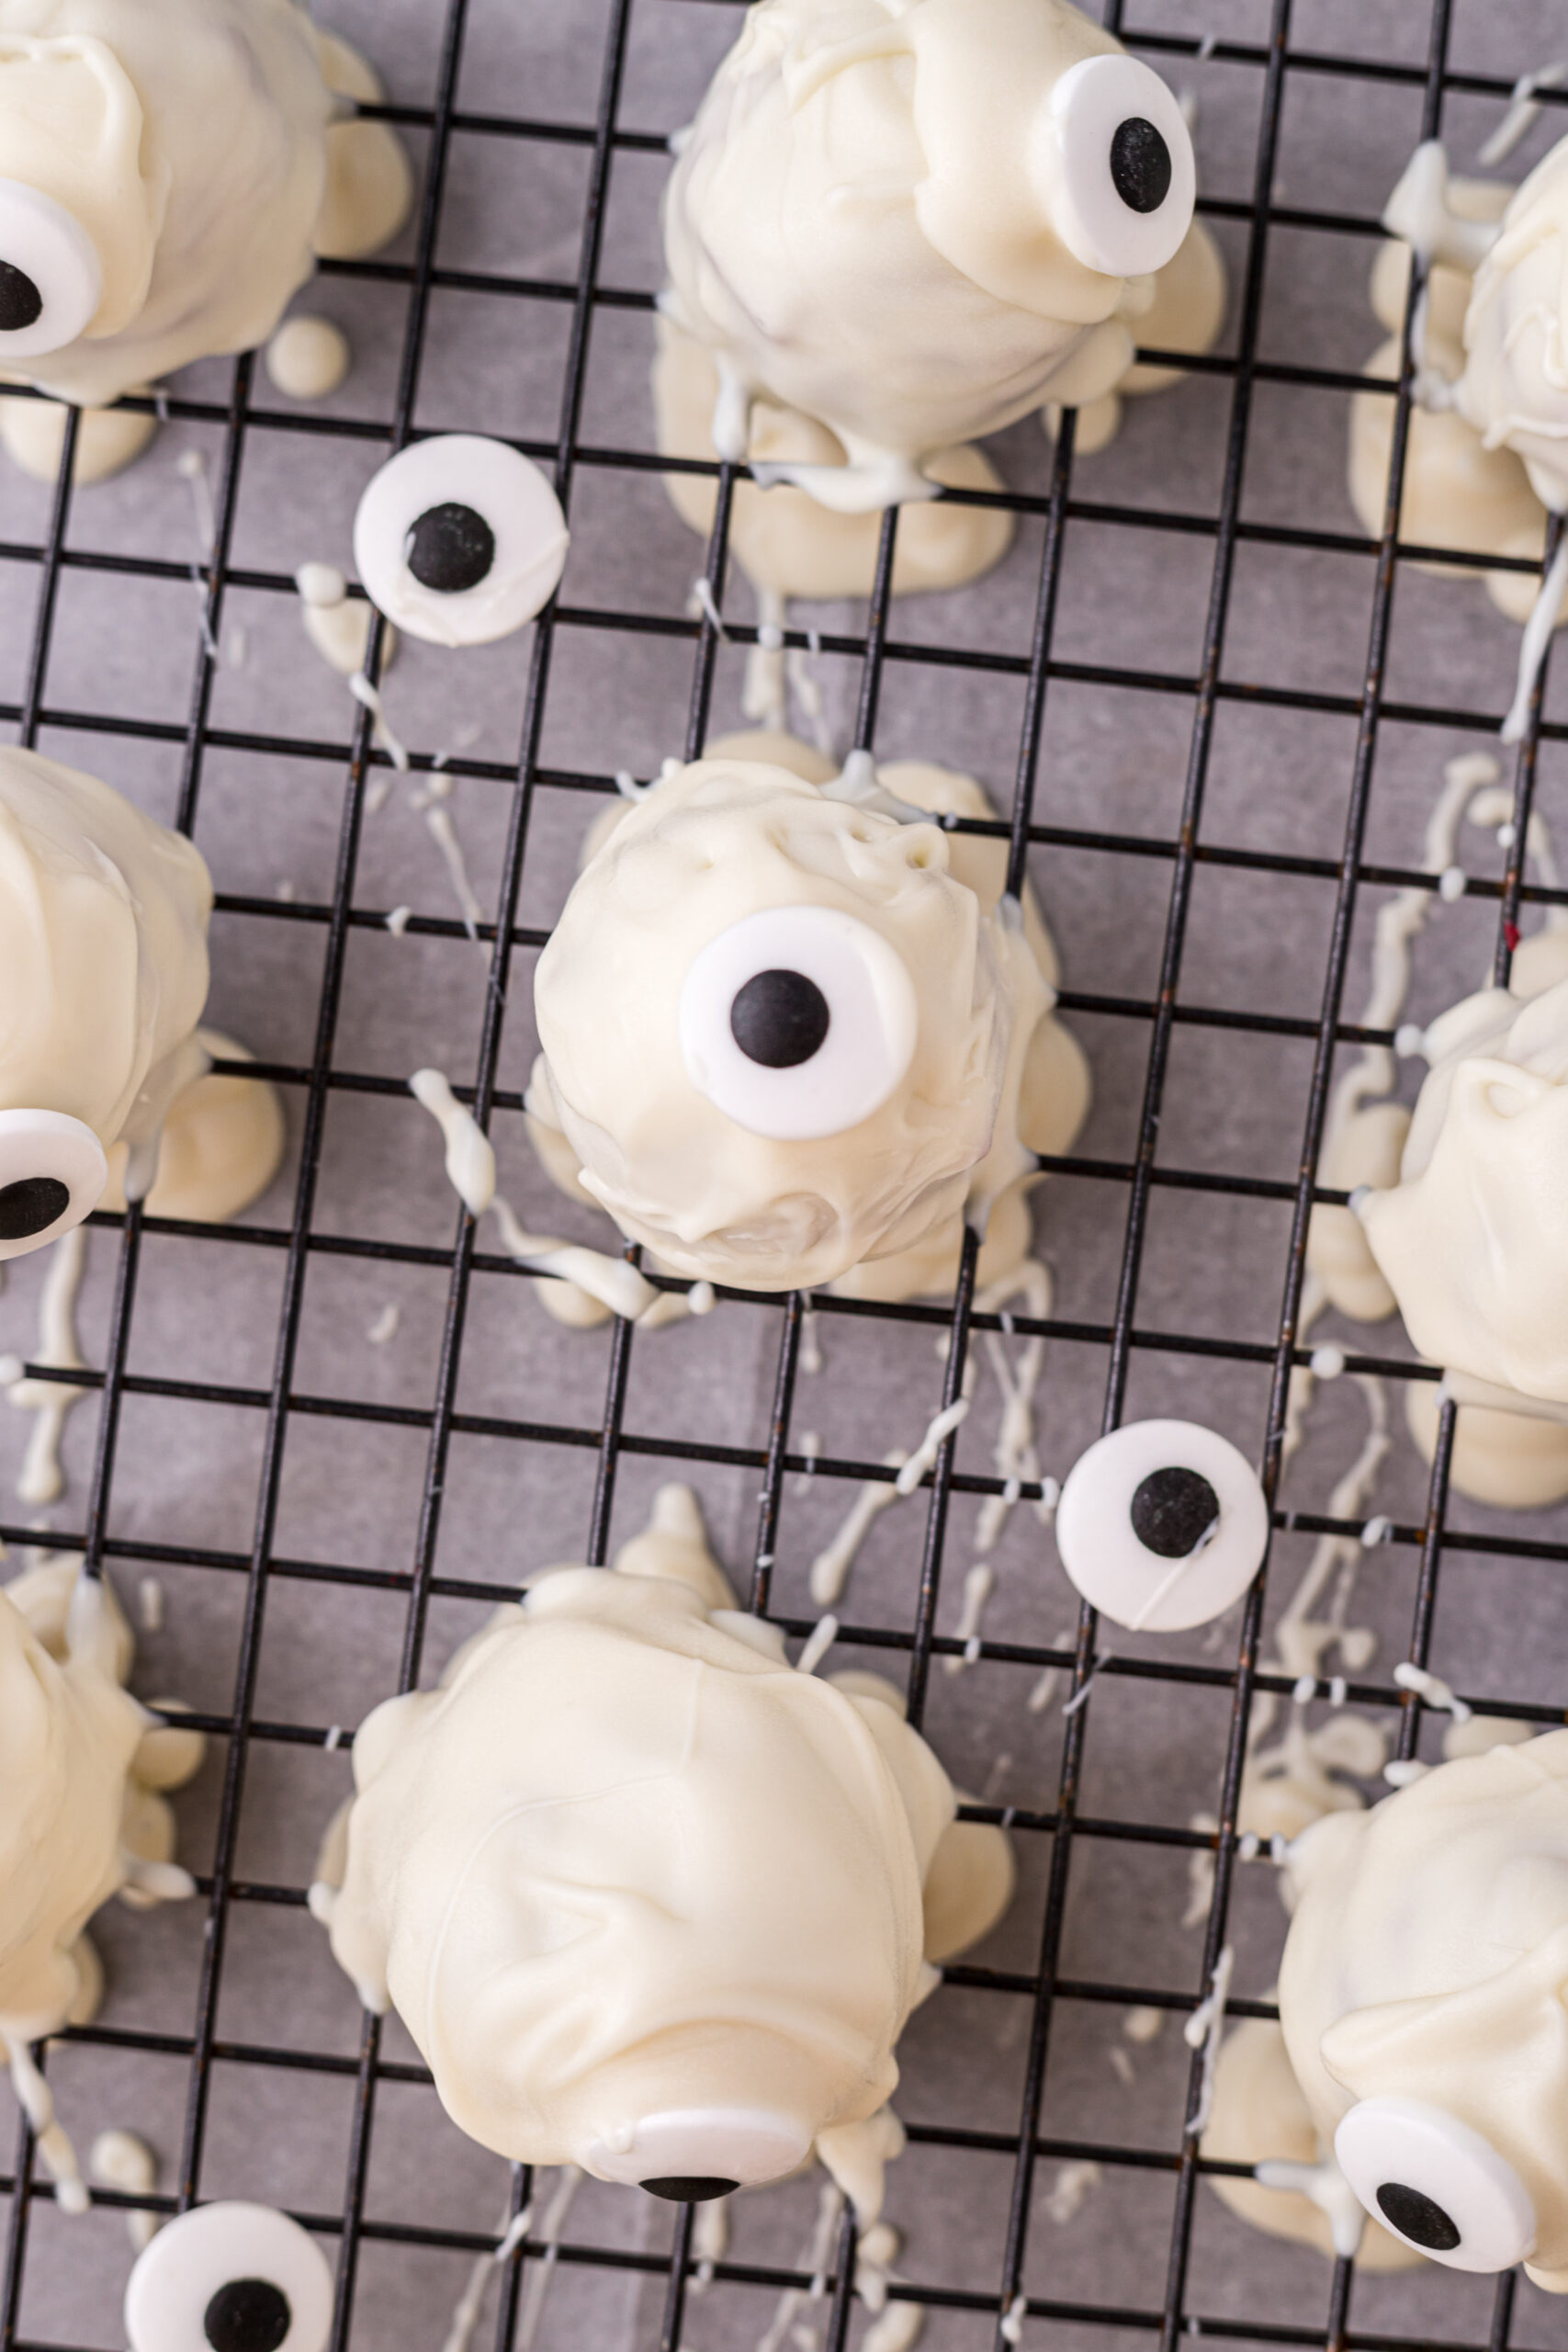
- Remove baking sheet from freezer. Dip the bottom of the cake ball into the white candy melts. Place dipped cake balls back on the baking sheet.
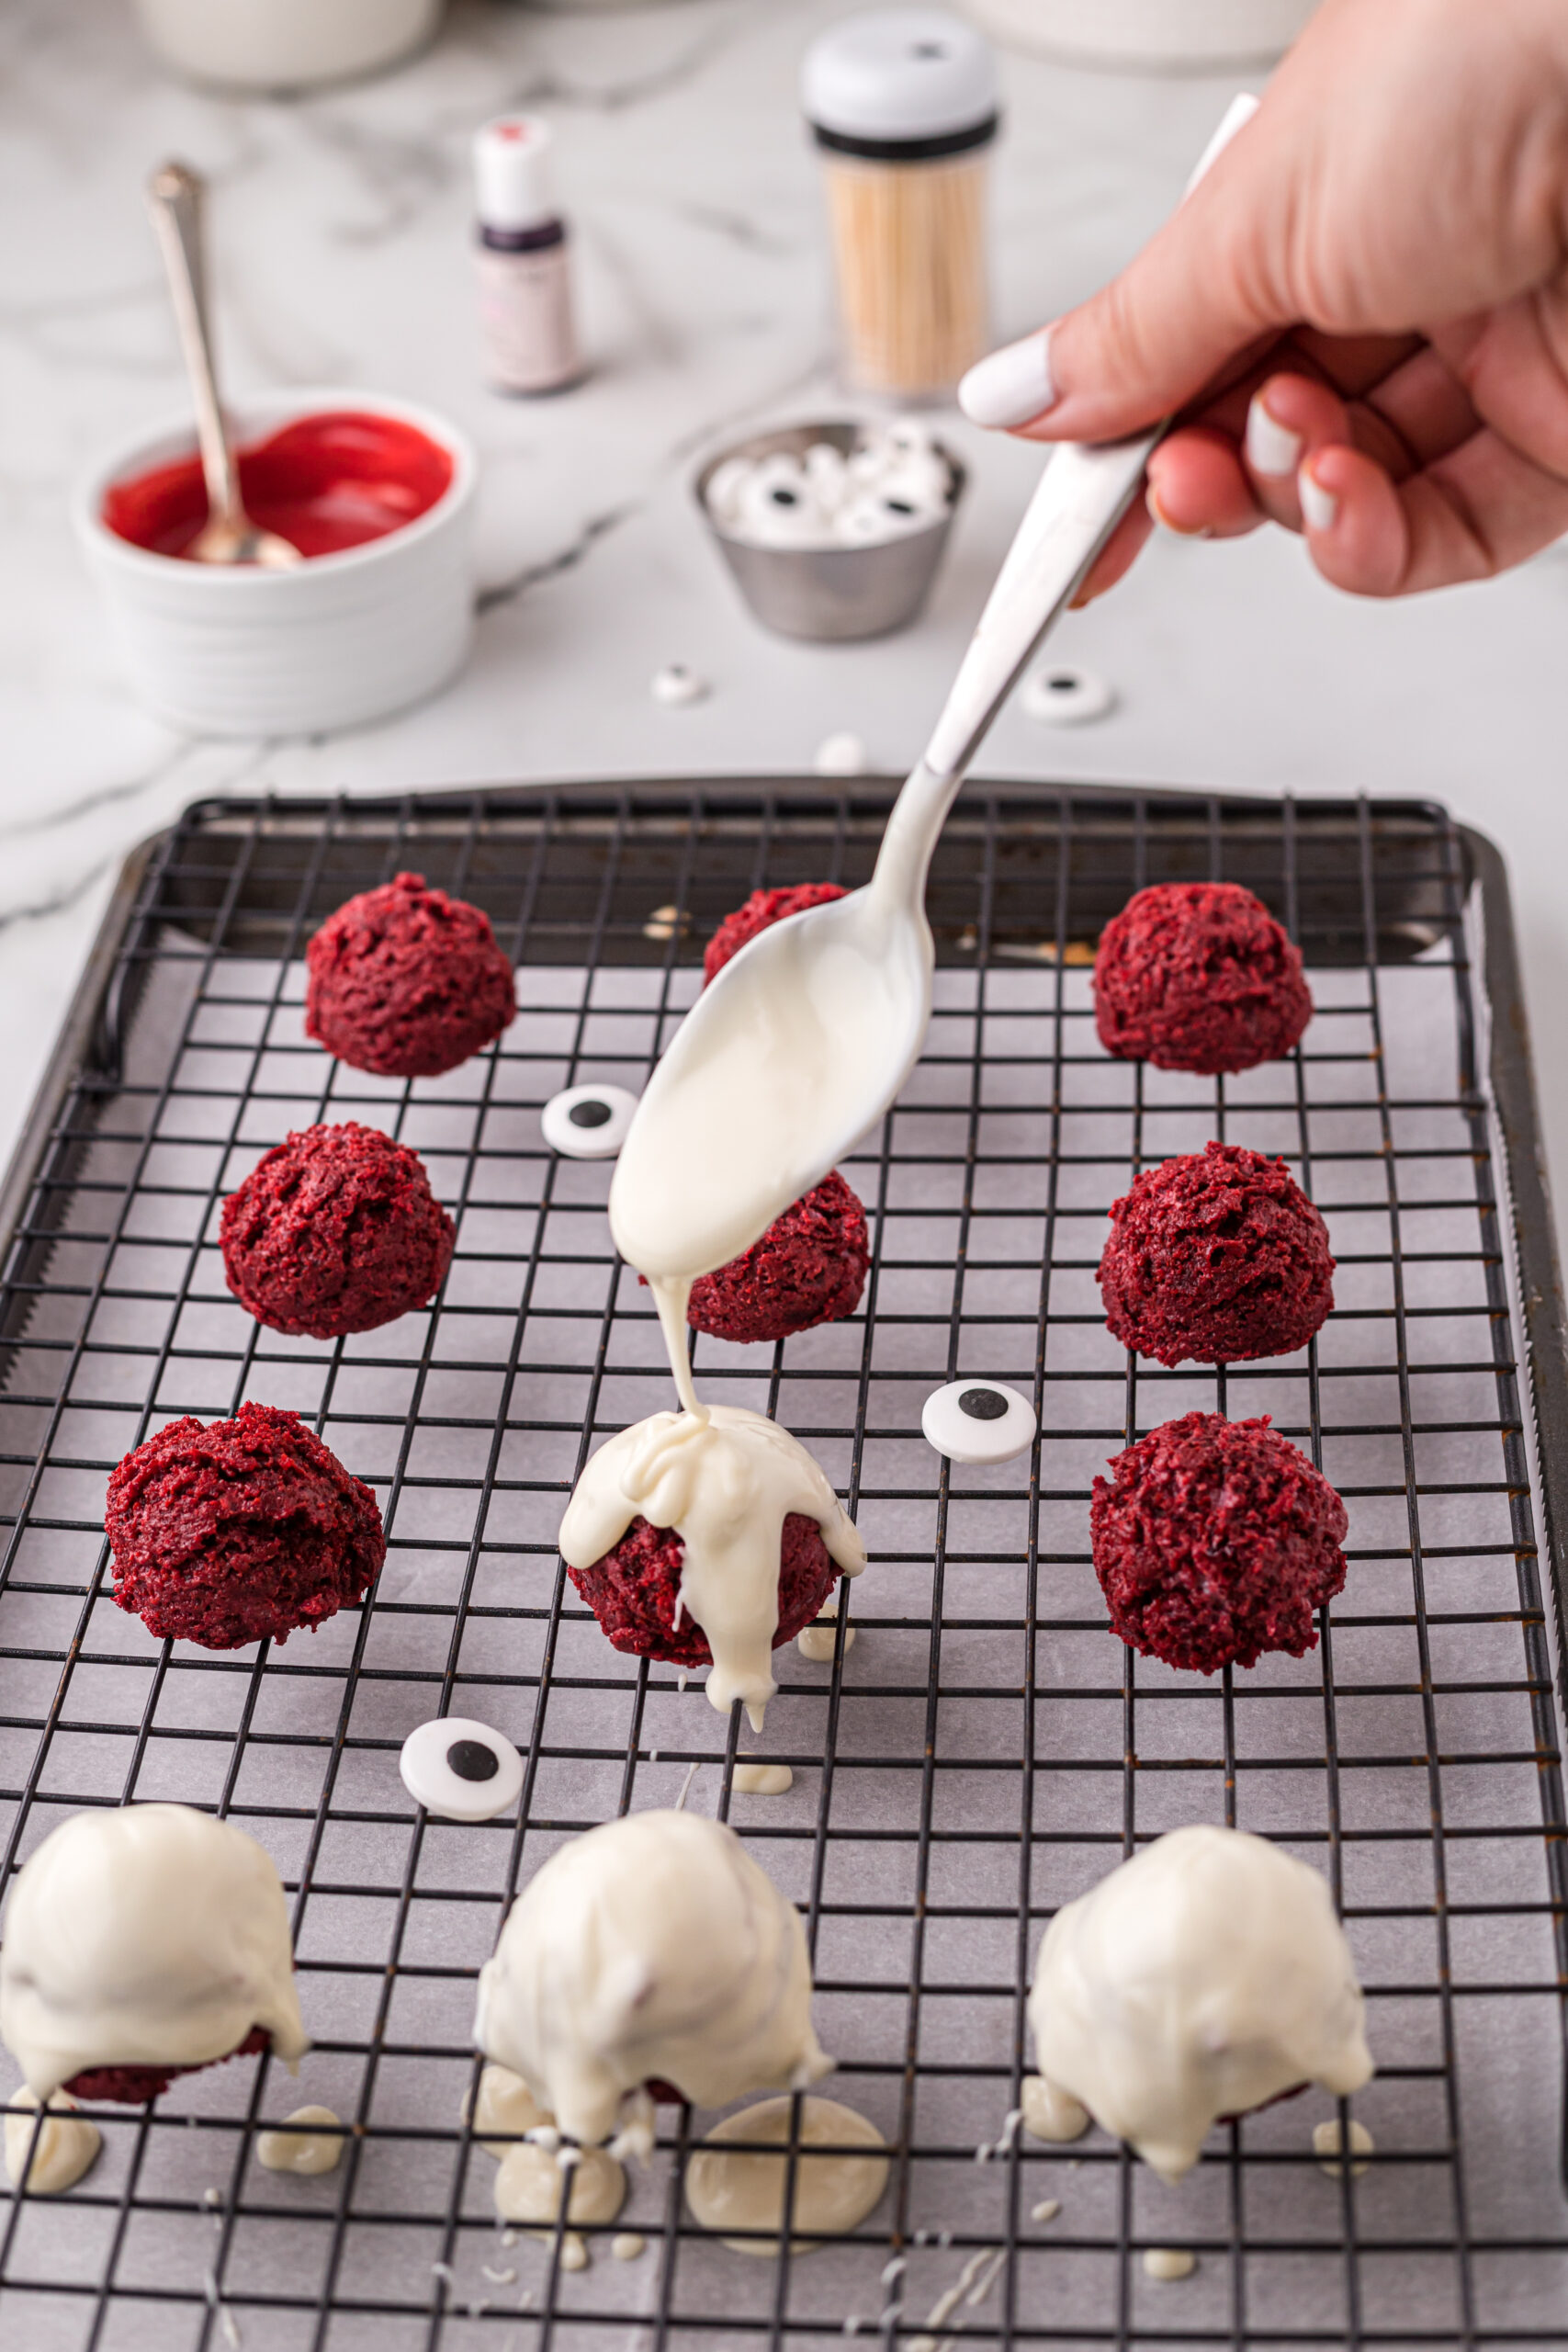
- Spoon white candy melt over the cake ball, making sure the whole cake ball is completely covered with the white candy melt.
- Add candy eyes to the white covered cake balls.
- Place covered cake balls back in the freezer for 30 minutes, or until candy melt has harden.
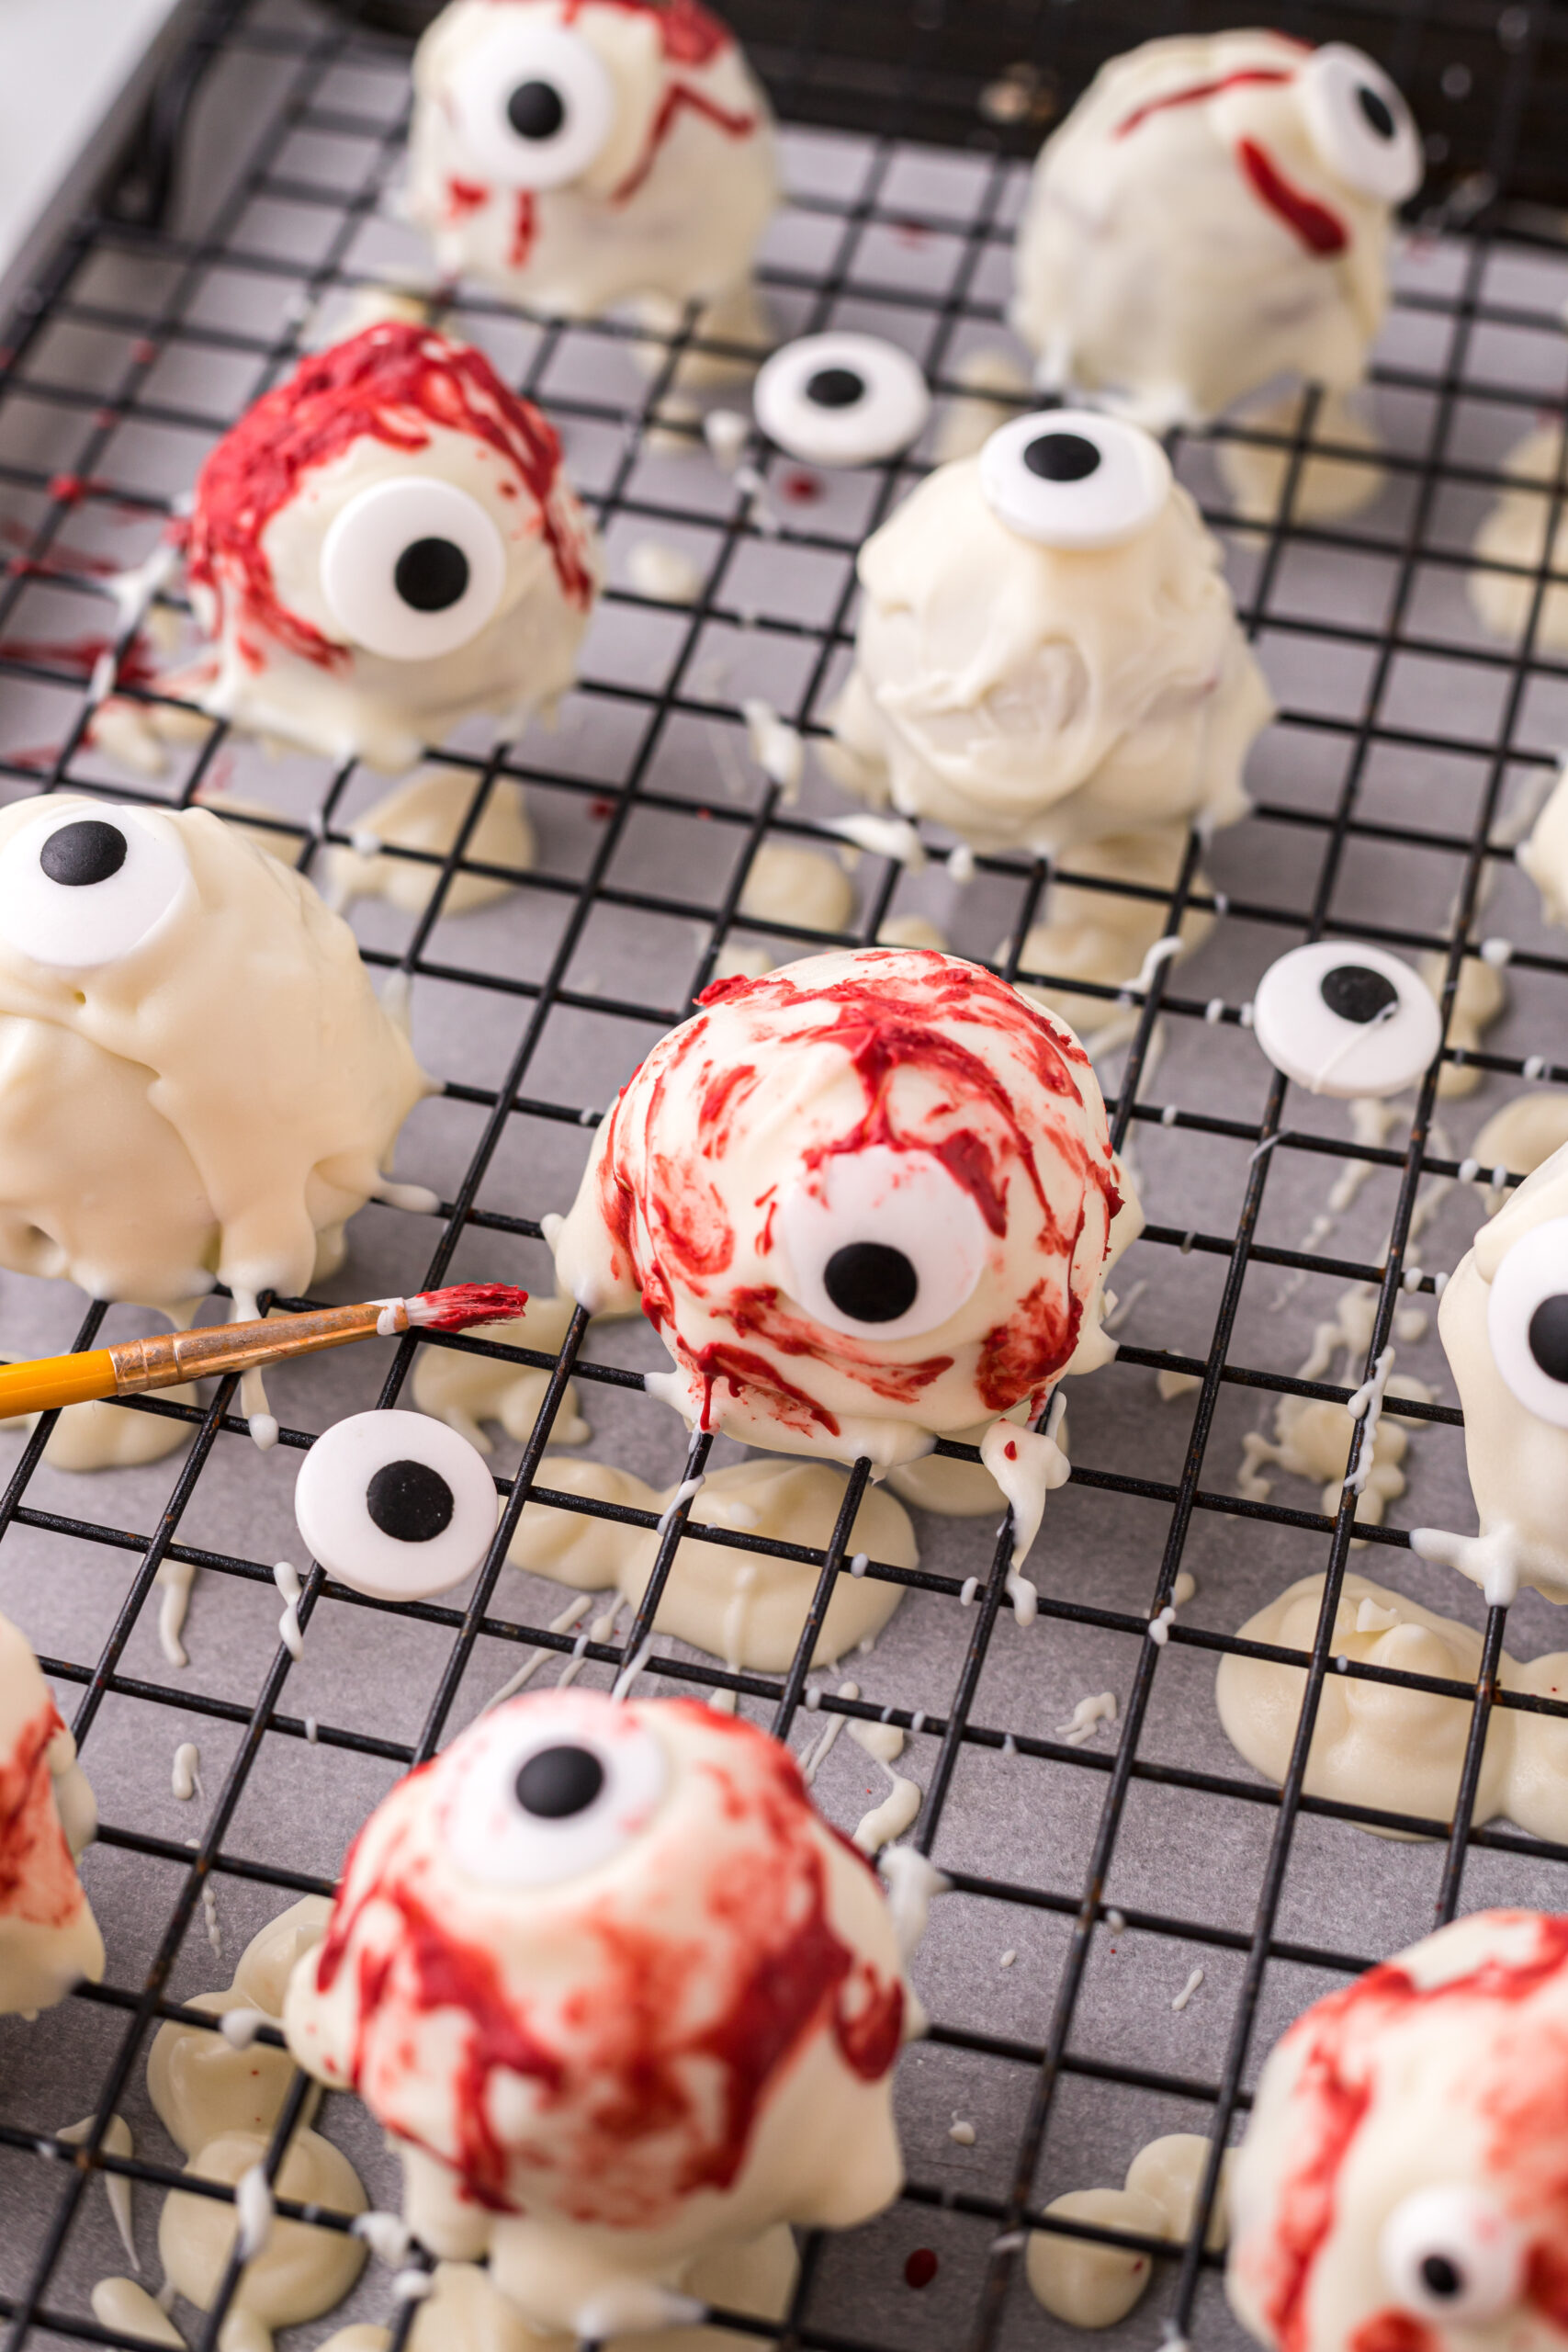
- Remove cake balls from freezer, with a tooth pick and paint brush add melted red candy to the eyes to create a vein look or blood.
- Store eyeballs in the refrigerator or freezer until you are ready to serve.

Frequent Asked Questions:
- Can I make cake balls ahead of time?
- Yes, you can make these up to 1 week before and place them in the freezer until you are ready to serve. Remember to store in a freezer safe sealed container. Also, I would recommend waiting to place the candy eye balls on before serving with a little bit of melted candy. Once the eyes have been frozen and come to room temperature the dye can sometimes spread.
- What is a cake ball?
- A cake ball is pretty much a truffle made from a baked cake and frosting then dipped in melted chocolate.
- How do you get the fork into the eyeball?
- So, to have a dramatic effect Before the candy melts harden, I slowly added a fork in the top about ¼”. You then just drizzle a little red candy melt to the fork so it will all harden together once in the freezer.
- How do you dip the cake ball?
- For these I recommend dipping the bottom into the melted chocolate then drizzling the melted candy over with a spoon until completely covered. 5. Do I need coconut oil to melt the candy melts? I highly recommend coconut oil; this will give the chocolate a smooth texture once melted.
- Do I need to really freeze the cake balls before adding the melted candy?
- Yes, this is extremely important step because you need to make sure the cake does not fall apart. They will be much harder to work with if they are not frozen.

JOIN THE COMMUNITY!!
Did you know I have a monthly meal subscription you can join? I create a new grocery list filled with tons of delicious recipes every month that you can make with the family! If you are the type of family that makes the same meals all the time then this is definitely something you should look into. Let me help you and change up your normal routine. Join today HERE and I promise you will love it!

Is the subscription not for you but you still want to know how to make some yummy recipes? Check out my cookbook HERE and become an expert in the kitchen!